NICによるWebアプリの通信制御
この章では、実際にデプロイしたNGINX Ingress Controllerを使い、様々なサンプルアプリケーションを動作させ、その設定方法や動きを確認いただきます。 設定例は NGINX Inc GitHubの examples/custom-resources/ に管理されております
シンプルなWebアプリケーションのデプロイ
シンプルなWebアプリケーションをデプロイします。 Kubernetes環境で、Webアプリケーションをデプロイします。そのアプリケーションに対し通信制御を行うVirtualServer、及びHTTPSに必要な証明書をデプロイします。
サンプルアプリケーションをデプロイ
cd ~/kubernetes-ingress/examples/custom-resources/basic-configuration/
kubectl create -f cafe.yaml
kubectl create -f cafe-secret.yaml
kubectl create -f cafe-virtual-server.yaml
リソースを確認
以下の通り、各リソースを適切に作成されていることを確認します。
kubectl get pod
1NAME                       READY   STATUS    RESTARTS  AGE
2coffee-7c86d7d67c-wjxss    1/1     Running   0         1m
3coffee-7c86d7d67c-8jm9z    1/1     Running   0         1m
4tea-5c457db9-dc4cs         1/1     Running   0         1m
kubectl get deployment
1NAME     READY   UP-TO-DATE   AVAILABLE   AGE
2coffee   2/2     2            2           1m
3tea      1/1     1            1           1m
kubectl get secret | grep cafe-secret
1cafe-secret kubernetes.io/tls 2 1m
kubectl get vs
1NAME   STATE   HOST               IP    PORTS   AGE
2cafe   Valid   cafe.example.com                 94s
動作確認
curlコマンドでリクエストを送信します。作成したWebアプリケーションから応答があることを確認します。 /coffee 、 /tea というURLに応じて異なるアプリケーションに転送されていることが確認できます
curl -H "Host:cafe.example.com" http://localhost/coffee
1Server address: 192.168.127.25:8080
2Server name: coffee-7c86d7d67c-wjxss
3Date: 17/Jan/2022:00:14:03 +0000
4URI: /coffee
5Request ID: 069567120c306da6f92e16e5d73e5040
curl -H "Host:cafe.example.com" http://localhost/tea
1Server address: 192.168.127.20:8080
2Server name: tea-5c457db9-dc4cs
3Date: 17/Jan/2022:00:14:08 +0000
4URI: /tea
5Request ID: 6fd58877d9e85903300df7ceb0f81eb2
同様に、HTTPSの接続を確認します。
curl -kv -H "Host:cafe.example.com" https://localhost/coffee
 1*   Trying 127.0.0.1:443...
 2* TCP_NODELAY set
 3* Connected to localhost (127.0.0.1) port 443 (#0)
 4* ALPN, offering h2
 5* ALPN, offering http/1.1
 6* successfully set certificate verify locations:
 7*   CAfile: /etc/ssl/certs/ca-certificates.crt
 8  CApath: /etc/ssl/certs
 9* TLSv1.3 (OUT), TLS handshake, Client hello (1):
10* TLSv1.3 (IN), TLS handshake, Server hello (2):
11* TLSv1.2 (IN), TLS handshake, Certificate (11):
12* TLSv1.2 (IN), TLS handshake, Server key exchange (12):
13* TLSv1.2 (IN), TLS handshake, Server finished (14):
14* TLSv1.2 (OUT), TLS handshake, Client key exchange (16):
15* TLSv1.2 (OUT), TLS change cipher, Change cipher spec (1):
16* TLSv1.2 (OUT), TLS handshake, Finished (20):
17* TLSv1.2 (IN), TLS handshake, Finished (20):
18* SSL connection using TLSv1.2 / ECDHE-RSA-AES256-GCM-SHA384
19* ALPN, server accepted to use http/1.1
20* Server certificate:
21*  subject: CN=NGINXIngressController
22*  start date: Sep 12 18:03:35 2018 GMT
23*  expire date: Sep 11 18:03:35 2023 GMT
24*  issuer: CN=NGINXIngressController
25*  SSL certificate verify result: self signed certificate (18), continuing anyway.
26> GET /coffee HTTP/1.1
27> Host:cafe.example.com
28> User-Agent: curl/7.68.0
29> Accept: */*
30>
31* Mark bundle as not supporting multiuse
32< HTTP/1.1 200 OK
33< Server: nginx/1.21.3
34< Date: Mon, 17 Jan 2022 00:14:34 GMT
35< Content-Type: text/plain
36< Content-Length: 164
37< Connection: keep-alive
38< Expires: Mon, 17 Jan 2022 00:14:33 GMT
39< Cache-Control: no-cache
40<
41Server address: 192.168.127.26:8080
42Server name: coffee-7c86d7d67c-8jm9z
43Date: 17/Jan/2022:00:14:34 +0000
44URI: /coffee
45Request ID: 3af5bd62d9756c934b4c731d0cadfcb1
46* Connection #0 to host localhost left intact
curl -kv -H "Host:cafe.example.com" https://localhost/tea
 1*   Trying 127.0.0.1:443...
 2* TCP_NODELAY set
 3* Connected to localhost (127.0.0.1) port 443 (#0)
 4* ALPN, offering h2
 5* ALPN, offering http/1.1
 6* successfully set certificate verify locations:
 7*   CAfile: /etc/ssl/certs/ca-certificates.crt
 8  CApath: /etc/ssl/certs
 9* TLSv1.3 (OUT), TLS handshake, Client hello (1):
10* TLSv1.3 (IN), TLS handshake, Server hello (2):
11* TLSv1.2 (IN), TLS handshake, Certificate (11):
12* TLSv1.2 (IN), TLS handshake, Server key exchange (12):
13* TLSv1.2 (IN), TLS handshake, Server finished (14):
14* TLSv1.2 (OUT), TLS handshake, Client key exchange (16):
15* TLSv1.2 (OUT), TLS change cipher, Change cipher spec (1):
16* TLSv1.2 (OUT), TLS handshake, Finished (20):
17* TLSv1.2 (IN), TLS handshake, Finished (20):
18* SSL connection using TLSv1.2 / ECDHE-RSA-AES256-GCM-SHA384
19* ALPN, server accepted to use http/1.1
20* Server certificate:
21*  subject: CN=NGINXIngressController
22*  start date: Sep 12 18:03:35 2018 GMT
23*  expire date: Sep 11 18:03:35 2023 GMT
24*  issuer: CN=NGINXIngressController
25*  SSL certificate verify result: self signed certificate (18), continuing anyway.
26> GET /tea HTTP/1.1
27> Host:cafe.example.com
28> User-Agent: curl/7.68.0
29> Accept: */*
30>
31* Mark bundle as not supporting multiuse
32< HTTP/1.1 200 OK
33< Server: nginx/1.21.3
34< Date: Mon, 17 Jan 2022 00:14:39 GMT
35< Content-Type: text/plain
36< Content-Length: 156
37< Connection: keep-alive
38< Expires: Mon, 17 Jan 2022 00:14:38 GMT
39< Cache-Control: no-cache
40<
41Server address: 192.168.127.20:8080
42Server name: tea-5c457db9-dc4cs
43Date: 17/Jan/2022:00:14:39 +0000
44URI: /tea
45Request ID: af1466d1fc1b7481cb82352885f9cbc2
リソースの削除
## cd ~/kubernetes-ingress/examples/custom-resources/basic-configuration/
kubectl delete -f cafe-secret.yaml
kubectl delete -f cafe-virtual-server.yaml
kubectl delete -f cafe.yaml
複数アプリケーション・チームを想定した VS / VSR 設定
NGINX Ingress Controller はCRDを用い、Virtual Server / Virtual Server Router / Policy といったリソースを使うことで、権限と設定範囲を適切に管理することが可能です。
ここでは、通信を待ち受けるため cafe namespace に、VirtualServer をデプロイします。そして tea / coffee namespace に アプリケーションと、アプリケーション宛に通信を転送するための VirtualServerRoute をデプロイします。
サンプルアプリケーションをデプロイ
cd ~/kubernetes-ingress/examples/custom-resources/cross-namespace-configuration
kubectl create -f namespaces.yaml
kubectl create -f tea.yaml
kubectl create -f coffee.yaml
kubectl create -f tea-virtual-server-route.yaml
kubectl create -f coffee-virtual-server-route.yaml
kubectl create -f cafe-secret.yaml
kubectl create -f cafe-virtual-server.yaml
リソースを確認
以下の通り、各リソースを適切に作成されていることを確認します。
kubectl get ns --sort-by=.metadata.creationTimestamp
1NAME               STATUS   AGE
2**省略**
3coffee             Active   75s
4cafe               Active   75s
5tea                Active   75s
kubectl get vsr -A
1NAMESPACE   NAME     STATE   HOST               IP    PORTS   AGE
2coffee      coffee   Valid   cafe.example.com                 89s
3tea         tea      Valid   cafe.example.com                 93s
kubectl get vs -A
1NAMESPACE   NAME   STATE   HOST               IP    PORTS   AGE
2cafe        cafe   Valid   cafe.example.com                 85s
kubectl get secret -A | grep cafe
1cafe               cafe-secret                                      kubernetes.io/tls                     2      101s
2cafe               default-token-94nrl                              kubernetes.io/service-account-token   3      2m3s
kubectl get secret -A | grep cafe-secret
1NAME                  TYPE                                  DATA   AGE
2cafe-secret           kubernetes.io/tls                     2      2m5s
kubectl get pod -o wide -A|grep -e coffee -e tea
1coffee             coffee-7c86d7d67c-pq5w2                    1/1     Running   0                88s   192.168.127.22   ip-10-1-1-9   <none>           <none>
2tea                tea-5c457db9-h5sm9                         1/1     Running   0                14m   192.168.127.24   ip-10-1-1-9   <none>           <none>
動作確認
curlコマンドでリクエストを送信します。作成したWebアプリケーションから応答があることを確認します。 /coffee 、 /tea というURLに応じて異なるアプリケーションに転送されていることが確認できます
curl -H "Host: cafe.example.com" http://localhost/coffee
1Server address: 192.168.127.22:8080
2Server name: coffee-7c86d7d67c-pq5w2
3Date: 17/Jan/2022:05:44:25 +0000
4URI: /coffee
5Request ID: 1414627aac091b5a7897bac37d046cea
curl -H "Host: cafe.example.com" http://localhost/tea
1Server address: 192.168.127.24:8080
2Server name: tea-5c457db9-h5sm9
3Date: 17/Jan/2022:05:44:29 +0000
4URI: /tea
5Request ID: 698ab29da633f24a9bf5384c1499b056
同様にHTTPSの接続を確認します。HTTPSの結果は /tea にアクセスした結果のみ掲載します。 /coffee の結果も合わせて確認ください。
curl -vk -H "Host: cafe.example.com" https://localhost/tea
 1*   Trying 127.0.0.1:443...
 2* TCP_NODELAY set
 3* Connected to localhost (127.0.0.1) port 443 (#0)
 4* ALPN, offering h2
 5* ALPN, offering http/1.1
 6* successfully set certificate verify locations:
 7*   CAfile: /etc/ssl/certs/ca-certificates.crt
 8  CApath: /etc/ssl/certs
 9* TLSv1.3 (OUT), TLS handshake, Client hello (1):
10* TLSv1.3 (IN), TLS handshake, Server hello (2):
11* TLSv1.2 (IN), TLS handshake, Certificate (11):
12* TLSv1.2 (IN), TLS handshake, Server key exchange (12):
13* TLSv1.2 (IN), TLS handshake, Server finished (14):
14* TLSv1.2 (OUT), TLS handshake, Client key exchange (16):
15* TLSv1.2 (OUT), TLS change cipher, Change cipher spec (1):
16* TLSv1.2 (OUT), TLS handshake, Finished (20):
17* TLSv1.2 (IN), TLS handshake, Finished (20):
18* SSL connection using TLSv1.2 / ECDHE-RSA-AES256-GCM-SHA384
19* ALPN, server accepted to use http/1.1
20* Server certificate:
21*  subject: CN=NGINXIngressController
22*  start date: Sep 12 18:03:35 2018 GMT
23*  expire date: Sep 11 18:03:35 2023 GMT
24*  issuer: CN=NGINXIngressController
25*  SSL certificate verify result: self signed certificate (18), continuing anyway.
26> GET /tea HTTP/1.1
27> Host: cafe.example.com
28> User-Agent: curl/7.68.0
29> Accept: */*
30>
31* Mark bundle as not supporting multiuse
32< HTTP/1.1 200 OK
33< Server: nginx/1.21.3
34< Date: Mon, 17 Jan 2022 05:44:42 GMT
35< Content-Type: text/plain
36< Content-Length: 156
37< Connection: keep-alive
38< Expires: Mon, 17 Jan 2022 05:44:41 GMT
39< Cache-Control: no-cache
40<
41Server address: 192.168.127.24:8080
42Server name: tea-5c457db9-h5sm9
43Date: 17/Jan/2022:05:44:42 +0000
44URI: /tea
45Request ID: 8ec25fd33d381df7261fda9f9da66558
46* Connection #0 to host localhost left intact
リソースの削除
## cd ~/kubernetes-ingress/examples/custom-resources/cross-namespace-configuration
kubectl delete -f tea-virtual-server-route.yaml
kubectl delete -f cafe-virtual-server.yaml
kubectl delete -f coffee-virtual-server-route.yaml
kubectl delete -f cafe-secret.yaml
kubectl delete -f tea.yaml
kubectl delete -f coffee.yaml
kubectl delete -f namespaces.yaml
通信内容による条件分岐・サービスへの転送
https://github.com/nginx/kubernetes-ingress/tree/v3.1.1/examples/custom-resources/advanced-routing
サンプルアプリケーションをデプロイ
cd ~/kubernetes-ingress/examples/custom-resources/advanced-routing
kubectl create -f cafe.yaml
kubectl create -f cafe-virtual-server.yaml
リソースを確認
ポイントとなるファイルの内容を確認します。
cafe-virtual-server.yaml で通信制御の条件を指定しています。条件は matches というパラメータで指定します。このサンプルの条件は以下の内容です。
path: /tea
リクエストのHTTPメソッド($request_method)が、POSTの場合、
tea-postへ転送する。 それ以外はteaへ転送する。
path: /coffee
cookie の version の値が v2 の場合、
coffee-v2へ転送する。それ以外はcoffee-v1へ転送する。
それぞれの記述内容を以下で確認してください。
 1apiVersion: k8s.nginx.org/v1
 2kind: VirtualServer
 3metadata:
 4  name: cafe
 5spec:
 6  host: cafe.example.com
 7  upstreams:
 8  - name: tea-post
 9    service: tea-post-svc
10    port: 80
11  - name: tea
12    service: tea-svc
13    port: 80
14  - name: coffee-v1
15    service: coffee-v1-svc
16    port: 80
17  - name: coffee-v2
18    service: coffee-v2-svc
19    port: 80
20  routes:
21  - path: /tea
22    matches:
23    - conditions:
24      - variable: $request_method
25        value: POST
26      action:
27        pass: tea-post
28    action:
29      pass: tea
30  - path: /coffee
31    matches:
32    - conditions:
33      - cookie: version
34        value: v2
35      action:
36        pass: coffee-v2
37    action:
38      pass: coffee-v1
以下の通り、各リソースを適切に作成されていることを確認します。
kubectl get deployment
1NAME        READY   UP-TO-DATE   AVAILABLE   AGE
2coffee-v1   1/1     1            1           16s
3coffee-v2   1/1     1            1           15s
4tea         1/1     1            1           15s
5tea-post    1/1     1            1           15s
kubectl get pod -o wide
1NAME                         READY   STATUS    RESTARTS   AGE   IP               NODE          NOMINATED NODE   READINESS GATES
2coffee-v1-6b78998db9-8cv49   1/1     Running   0          26s   192.168.127.23   ip-10-1-1-9   <none>           <none>
3coffee-v2-748cbbb49f-mbxpr   1/1     Running   0          26s   192.168.127.27   ip-10-1-1-9   <none>           <none>
4tea-5c457db9-dcswc           1/1     Running   0          26s   192.168.127.33   ip-10-1-1-9   <none>           <none>
5tea-post-7db8cd8bf-m5gbz     1/1     Running   0          26s   192.168.127.32   ip-10-1-1-9   <none>           <none>
kubectl get vs
1NAME   STATE   HOST               IP    PORTS   AGE
2cafe   Valid   cafe.example.com                 28s
動作確認
先程、設定ファイルから確認した条件を再度記載します。
path: /tea
リクエストのHTTPメソッド($request_method)が、POSTの場合、
tea-postへ転送する。 それ以外はteaへ転送する。
path: /coffee
cookie の version の値が v2 の場合、
coffee-v2へ転送する。それ以外はcoffee-v1へ転送する。
Curlコマンドで動作を確認します。
/tea 宛でHTTPメソッドを指定しない(GET)の場合の動作は以下の通りです
curl -H "Host: cafe.example.com" http://localhost/tea
1Server address: 192.168.127.33:8080
2Server name: tea-5c457db9-dcswc
3Date: 17/Jan/2022:09:00:56 +0000
4URI: /tea
5Request ID: 00e9eb4d61f7afdb8c5656da94d15b98
/tea 宛でHTTP POSTメソッドを指定した場合の動作は以下の通りです。
curl -H "Host: cafe.example.com" http://localhost/tea -X POST
1Server address: 192.168.127.32:8080
2Server name: tea-post-7db8cd8bf-m5gbz
3Date: 17/Jan/2022:09:01:02 +0000
4URI: /tea
5Request ID: 4deeb82434a6f799ffc894a229ac361a
/coffee 宛でCookieの値を指定しない場合の動作は以下の通りです。
curl -H "Host: cafe.example.com" http://localhost/coffee
1Server address: 192.168.127.23:8080
2Server name: coffee-v1-6b78998db9-8cv49
3Date: 17/Jan/2022:09:01:25 +0000
4URI: /coffee
5Request ID: 8d182c9c060d5a4d4dec226292ac2820
/coffee 宛でCookieに”version=v2”と指定した場合の動作は以下の通りです。
curl -H "Host: cafe.example.com" http://localhost/coffee --cookie "version=v2"
1Server address: 192.168.127.27:8080
2Server name: coffee-v2-748cbbb49f-mbxpr
3Date: 17/Jan/2022:09:01:35 +0000
4URI: /coffee
5Request ID: befacc5e7ca56a1a09e5982315c74fa0
リソースの削除
## cd ~/kubernetes-ingress/examples/custom-resources/advanced-routing
kubectl delete  -f cafe-virtual-server.yaml
kubectl delete  -f cafe.yaml
割合を指定した分散 (Traffic Split)
https://github.com/nginx/kubernetes-ingress/tree/v3.1.1/examples/custom-resources/traffic-splitting
割合を指定し、トラフィックを分散することができます。
サンプルアプリケーションをデプロイ
cd ~/kubernetes-ingress/examples/custom-resources/traffic-splitting
kubectl create -f cafe.yaml
kubectl create -f cafe-virtual-server.yaml
Virtual Serverの内容を確認します。 cafe-virtual-server.yaml の /coffee に splits を指定し、更に weight でサービスへ転送する割合を指定しています。
リソースを確認
以下の通り、各リソースを適切に作成されていることを確認します。
kubectl get deployment
1NAME        READY   UP-TO-DATE   AVAILABLE   AGE
2coffee-v1   2/2     2            2           19s
3coffee-v2   2/2     2            2           19s
kubectl get pod -o wide
1NAME                         READY   STATUS    RESTARTS   AGE   IP               NODE          NOMINATED NODE   READINESS GATES
2coffee-v1-6b78998db9-h4jkb   1/1     Running   0          25s   192.168.127.47   ip-10-1-1-9   <none>           <none>
3coffee-v1-6b78998db9-nn42z   1/1     Running   0          25s   192.168.127.44   ip-10-1-1-9   <none>           <none>
4coffee-v2-748cbbb49f-llpb6   1/1     Running   0          25s   192.168.127.45   ip-10-1-1-9   <none>           <none>
5coffee-v2-748cbbb49f-vrpzx   1/1     Running   0          25s   192.168.127.46   ip-10-1-1-9   <none>           <none>
kubectl get vs
1NAME   STATE   HOST               IP    PORTS   AGE
2cafe   Valid   cafe.example.com                 26s
動作確認
Curlコマンドで複数回リクエストを送ると、 coffee-v1 、 coffee-v2 のそれぞれに転送されていることが確認できます。
curl -s -H "Host: cafe.example.com" http://localhost/coffee
1Server address: 192.168.127.44:8080
2Server name: coffee-v1-6b78998db9-nn42z
3Date: 17/Jan/2022:12:26:49 +0000
4URI: /coffee
5Request ID: c127f0f724eb1b3becd57603b6d603ea
curl -s -H "Host: cafe.example.com" http://localhost/coffee
1Server address: 192.168.127.45:8080
2Server name: coffee-v2-748cbbb49f-llpb6
3Date: 17/Jan/2022:12:26:37 +0000
4URI: /coffee
5Request ID: 357237a3fea498b6efd90c929d526e64
以下コマンドを参考に複数回Curlを実行し、その結果をファイルに記録します。記録の内容より coffee-v1 に coffee-v2 転送した数を確認できます。
分散する割合は少しばらつきが発生しますが、参考として分散した数の結果を確認してください。
## cd ~/kubernetes-ingress/examples/custom-resources/traffic-splitting
> split.txt ;\
for i in {1..20}; \
do curl -s -H "Host: cafe.example.com" http://localhost/coffee | grep "Server name" >> split.txt ; \
done ; \
echo -n "v1:" ; grep v1 split.txt  | wc -l ; echo -n "v2:"  ; grep v2 split.txt  | wc -l
1v1:18
2v2:2
リソースの削除
## cd ~/kubernetes-ingress/examples/custom-resources/traffic-splitting
kubectl delete -f cafe-virtual-server.yaml
kubectl delete -f cafe.yaml
rm split.txt
IPアドレスによる通信の制御 (Access Control)
https://github.com/nginx/kubernetes-ingress/tree/v3.1.1/examples/custom-resources/access-control
Policyにより通信制御を行う方法を確認します。リクエストの送信元IPアドレスに応じて通信の許可・拒否を行う方法を確認します。
サンプルアプリケーションをデプロイ
cd ~/kubernetes-ingress/examples/custom-resources/access-control
kubectl apply -f webapp.yaml
kubectl apply -f access-control-policy-deny.yaml
kubectl apply -f virtual-server.yaml
リソースを確認
以下の通り、各リソースを適切に作成されていることを確認します。
kubectl get pod
1NAME                     READY   STATUS    RESTARTS   AGE
2webapp-64d444885-j4q7z   1/1     Running   0          2m7s
kubectl get deployment
1NAME     READY   UP-TO-DATE   AVAILABLE   AGE
2webapp   1/1     1            1           2m13s
kubectl get vs
1NAME     STATE   HOST                 IP    PORTS   AGE
2webapp   Valid   webapp.example.com                 2m8s
kubectl get policy
1NAME            STATE   AGE
2webapp-policy   Valid   2m18s
VirtualServerに webapp-policy が割り当てられていることが確認できます。
kubectl describe vs
 1Name:         webapp
 2Namespace:    default
 3Labels:       <none>
 4Annotations:  <none>
 5API Version:  k8s.nginx.org/v1
 6Kind:         VirtualServer
 7
 8** 省略 **
 9
10Spec:
11  Host:  webapp.example.com
12  Policies:
13    Name:  webapp-policy
14  Routes:
15    Action:
16      Pass:  webapp
17    Path:    /
18  Upstreams:
19    Name:     webapp
20    Port:     80
21    Service:  webapp-svc
22Status:
23  External Endpoints:
24    Ip:
25    Ports:
26  Message:  Configuration for default/webapp was added or updated
27  Reason:   AddedOrUpdated
28  State:    Valid
Spec に記載されています。kubectl describe policy
 1Name:         webapp-policy
 2Namespace:    default
 3Labels:       <none>
 4Annotations:  <none>
 5API Version:  k8s.nginx.org/v1
 6Kind:         Policy
 7
 8** 省略 **
 9
10Spec:
11  Access Control:
12    Deny:
13      10.0.0.0/8
14Status:
15  Message:  Policy default/webapp-policy was added or updated
16  Reason:   AddedOrUpdated
17  State:    Valid
18Events:
19  Type    Reason          Age                  From                      Message
20  ----    ------          ----                 ----                      -------
21  Normal  AddedOrUpdated  61s (x3 over 2m31s)  nginx-ingress-controller  Policy default/webapp-policy was added or updated
動作確認
curlコマンドで動作を確認します。以下のように通信が 拒否 されていることが確認できます
curl -H "Host:webapp.example.com" http://localhost/
1<html>
2<head><title>403 Forbidden</title></head>
3<body>
4<center><h1>403 Forbidden</h1></center>
5<hr><center>nginx/1.21.3</center>
6</body>
7</html>
webapp-policy の内容を変更します
## cd ~/kubernetes-ingress/examples/custom-resources/access-control
kubectl apply -f access-control-policy-allow.yaml
コマンドを実行しPolicyの内容を確認します。Policyの内容が Spec に記載されています。
kubectl describe policy
 1Name:         webapp-policy
 2Namespace:    default
 3Labels:       <none>
 4Annotations:  <none>
 5API Version:  k8s.nginx.org/v1
 6Kind:         Policy
 7
 8** 省略 **
 9
10Spec:
11  Access Control:
12    Allow:
13      10.0.0.0/8
14Status:
15  Message:  Policy default/webapp-policy was added or updated
16  Reason:   AddedOrUpdated
17  State:    Valid
curlコマンドで動作を確認します。以下のように通信が 許可 されていることが確認できます
curl -H "Host:webapp.example.com" http://localhost/
1Server address: 192.168.127.48:8080
2Server name: webapp-64d444885-j4q7z
3Date: 17/Jan/2022:12:48:51 +0000
4URI: /
5Request ID: 752997339b21d94210fc911cb41f7216
リソースの削除
## cd ~/kubernetes-ingress/examples/custom-resources/access-control
kubectl delete -f access-control-policy-allow.yaml
kubectl delete -f virtual-server.yaml
kubectl delete -f webapp.yaml
URL Path の 変換 (Rewrite)
https://github.com/nginx/kubernetes-ingress/tree/v3.1.1/examples/custom-resources/rewrites
Rewrite を用いて、URL Path を書換えることが可能です。
サンプルアプリケーションをデプロイ
cd ~/kubernetes-ingress/examples/custom-resources/rewrites
cat << EOF > rewrite-virtual-server.yaml
apiVersion: k8s.nginx.org/v1
kind: VirtualServer
metadata:
  name: cafe
spec:
  host: cafe.example.com
  upstreams:
  - name: tea
    service: tea-svc
    port: 80
  - name: coffee
    service: coffee-svc
    port: 80
  routes:
  - path: /tea/
    action:
      proxy:
        upstream: tea
        rewritePath: /
  - path: /coffee
    action:
      proxy:
        upstream: coffee
        rewritePath: /beans
  - path: ~ /(\w+)/(.+\.(?:gif|jpg|png)$)
    action:
      proxy:
        upstream: tea
        rewritePath: /service/\$1/image/\$2
EOF

kubectl apply -f ../basic-configuration/cafe.yaml
kubectl apply -f rewrite-virtual-server.yaml
リソースを確認
Virtual Serverの定義内容を確認します。route に 3つのPathを定義し、rewritePath でURLの書換えを行います。該当のPathでそれぞれのサービスに適したPathの書換えルールを定義します。
書換えのルールを表にまとめます。
Path |
一致タイプ |
Rewrite |
結果 |
|---|---|---|---|
/tea/ |
完全一致 |
/ |
/tea/abc -> /abc |
/coffee |
完全一致 |
/beans |
/coffee/def/ghi -> /beans/def/ghi |
~ /(w+)/(.+.(?:gif|jpg|png)$) |
正規表現 |
/service/$1/image/$2 |
/cafe/top.jpg -> /service/cafe/image/top.jpg |
以下の通り、各リソースを適切に作成されていることを確認します。
kubectl get pod
1NAME                      READY   STATUS    RESTARTS   AGE
2coffee-7c86d7d67c-ws2t8   1/1     Running   0          39m
3coffee-7c86d7d67c-zt5tr   1/1     Running   0          39m
4tea-5c457db9-ksljs        1/1     Running   0          39m
kubectl get deployment
1NAME     READY   UP-TO-DATE   AVAILABLE   AGE
2coffee   2/2     2            2           39m
3tea      1/1     1            1           39m
kubectl get vs
1NAME   STATE   HOST               IP    PORTS   AGE
2cafe   Valid   cafe.example.com                 39m
動作確認
先程定義を確認したとおり、URLが書換えられていることが確認できます。
curl -H "Host:cafe.example.com" http://localhost/tea/
1Server address: 192.168.127.40:8080
2Server name: tea-5c457db9-ksljs
3Date: 17/Jan/2022:14:22:46 +0000
4URI: /
5Request ID: 2576a16546e7d17467e04da2ab794109
curl -H "Host:cafe.example.com" http://localhost/tea/abc
1Server address: 192.168.127.40:8080
2Server name: tea-5c457db9-ksljs
3Date: 17/Jan/2022:14:22:14 +0000
4URI: /abc
5Request ID: 5ce49a600fb24a40340ba6edad91ffb2
curl -H "Host:cafe.example.com" http://localhost/coffee
1Server address: 192.168.127.39:8080
2Server name: coffee-7c86d7d67c-zt5tr
3Date: 17/Jan/2022:14:22:40 +0000
4URI: /beans
5Request ID: 9b15d10a624faee145b875b8f83460e3
curl -H "Host:cafe.example.com" http://localhost/coffee/def/ghi
1Server address: 192.168.127.39:8080
2Server name: coffee-7c86d7d67c-zt5tr
3Date: 17/Jan/2022:14:22:27 +0000
4URI: /beans/def/ghi
5Request ID: f70d98547c615a145b2a40ddfe5884a4
curl -H "Host:cafe.example.com" http://localhost/cafe/top.jpg
1Server address: 192.168.127.40:8080
2Server name: tea-5c457db9-ksljs
3Date: 17/Jan/2022:14:23:02 +0000
4URI: /service/cafe/image/top.jpg
5Request ID: 38c3cf24e3f5e0cdfe451b0d646c0e1d
リソースの削除
## cd ~/kubernetes-ingress/examples/custom-resources/rewrites
kubectl delete -f ../basic-configuration/cafe.yaml
kubectl delete -f rewrite-virtual-server.yaml
Ingress Controller で JWT Validation のデプロイ
https://github.com/nginx/kubernetes-ingress/tree/v3.1.1/examples/custom-resources/jwt
NGINX Ingress Controller で JWT の Validation を行い、通信制御を行うことが可能です。
サンプルアプリケーションをデプロイ
cd ~/kubernetes-ingress/examples/custom-resources/jwt/
kubectl apply -f webapp.yaml
kubectl apply -f jwk-secret.yaml
kubectl apply -f jwt.yaml
kubectl apply -f virtual-server.yaml
リソースを確認
利用するファイルの内容を確認します
まず、JWK(Json Web Key)としてVirtual ServerのPolicy内で指定するsecretの内容を確認します
1apiVersion: v1
2kind: Secret
3metadata:
4  name: jwk-secret
5type: nginx.org/jwk
6data:
7  jwk: eyJrZXlzIjoKICAgIFt7CiAgICAgICAgImsiOiJabUZ1ZEdGemRHbGphbmQwIiwKICAgICAgICAia3R5Ijoib2N0IiwKICAgICAgICAia2lkIjoiMDAwMSIKICAgIH1dCn0K
jwk というKeyに対し、 値 として文字列が指定されていることが確認できます。
文字列の内容をbase64デコードします
# echo -n <jwk に指定された文字列> | base64 -d
echo -n "eyJrZXlzIjoKICAgIFt7CiAgICAgICAgImsiOiJabUZ1ZEdGemRHbGphbmQwIiwKICAgICAgICAia3R5Ijoib2N0IiwKICAgICAgICAia2lkIjoiMDAwMSIKICAgIH1dCn0K" | base64 -d
出力結果が以下となります。
1{"keys":
2    [{
3        "k":"ZmFudGFzdGljand0",
4        "kty":"oct",
5        "kid":"0001"
6    }]
7}
各パラメータ内容は以下の通り
Parameter |
意味 |
Link |
|---|---|---|
k |
k (key value) パラメータは, kty octで利用する base64url encodeされたKey文字列をもつ |
|
kty |
kty (key type) パラメータは, RSA や EC といった暗号アルゴリズムファミリーを示す |
|
kid |
kid (key ID) パラメータは特定の鍵を識別するために用いられる |
kty “oct” で利用する Keyの内容をBase64デコードした結果は以下の通り
echo -n "ZmFudGFzdGljand0" | base64 -d
1fantasticjwt
この結果により、このサンプルでは fantasticjwt という文字列がKeyとして使用されていることが確認できます。
今回サンプルリクエストに利用するJWTがこの文字列で署名されたものであるか確認します。 token.jwt の内容を表示します。
1eyJ0eXAiOiJKV1QiLCJhbGciOiJIUzI1NiIsImtpZCI6IjAwMDEifQ.eyJuYW1lIjoiUXVvdGF0aW9uIFN5c3RlbSIsInN1YiI6InF1b3RlcyIsImlzcyI6Ik15IEFQSSBHYXRld2F5In0.ggVOHYnVFB8GVPE-VOIo3jD71gTkLffAY0hQOGXPL2I
HS256 であることを確認します。your-256-bit-secret に先程 jwk の内容をデコードして確認した文字列 fantasticjwt を入力してください。token.jwt の内容を貼り付け、左下の表示が Signature Verified となることを確認してください。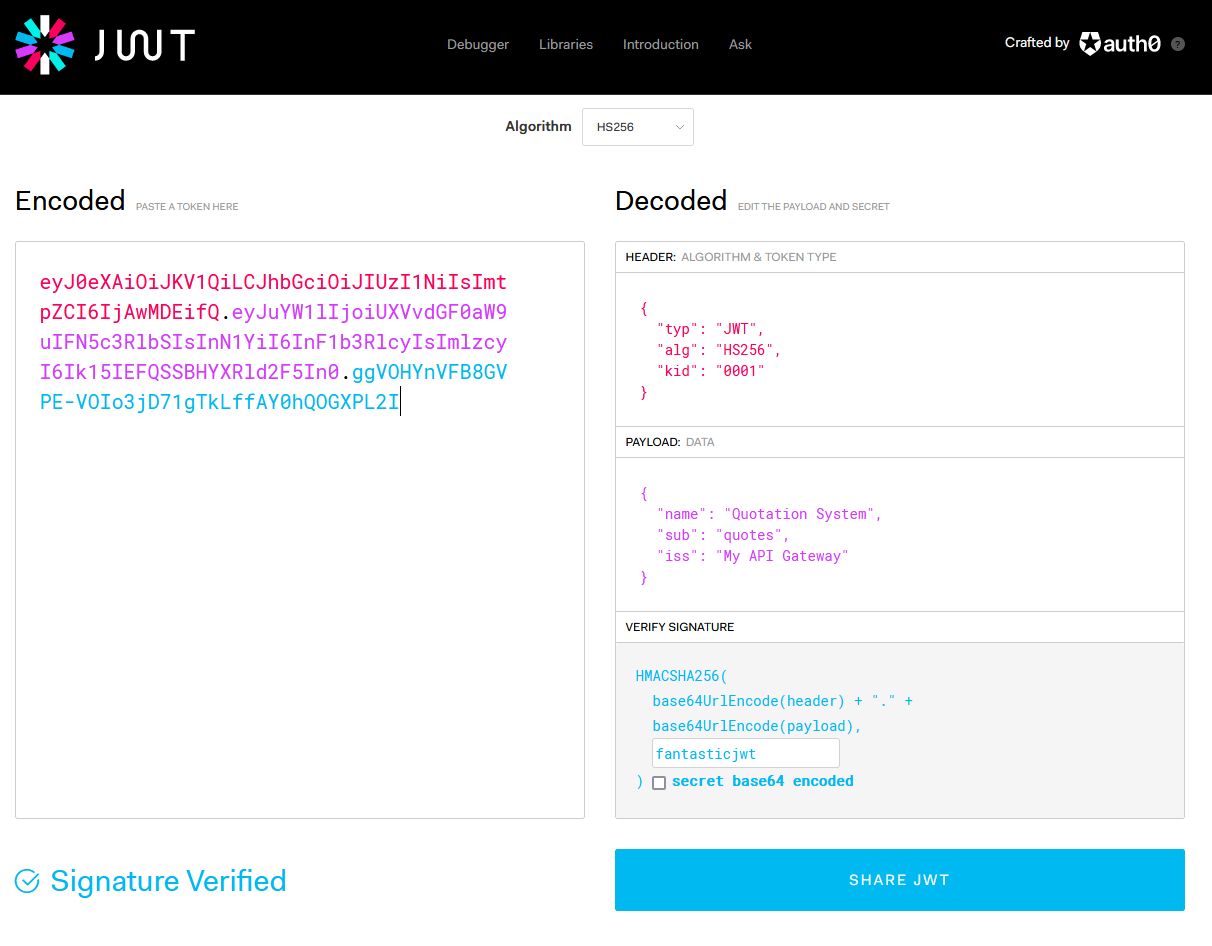
その他、NGINX Plus / JWT に関する詳細は Blog:Authenticating API Clients with JWT and NGINX Plus を参照してください
VirtualServerで利用するPolicyについて確認します。まずVirtualServerの内容は以下です
 1apiVersion: k8s.nginx.org/v1
 2kind: VirtualServer
 3metadata:
 4  name: webapp
 5spec:
 6  host: webapp.example.com
 7  policies:
 8  - name: jwt-policy
 9  upstreams:
10  - name: webapp
11    service: webapp-svc
12    port: 80
13  routes:
14  - path: /
15    action:
16      pass: webapp
hostに対し jwt-policy というポリシーが適用されていることが確認できます。
では次に、Policyの内容を確認します
1apiVersion: k8s.nginx.org/v1
2kind: Policy
3metadata:
4  name: jwt-policy
5spec:
6  jwt:
7    realm: MyProductAPI
8    secret: jwk-secret
9    token: $http_token
jwt-policy という名前のPolicyとなります。jwt-secret が指定されており、token というhttp headerの値とするため、 $http_token を指定しています。以下の通り、各リソースを適切に作成されていることを確認します。
kubectl get deployment
1NAME     READY   UP-TO-DATE   AVAILABLE   AGE
2webapp   1/1     1            1           23s
kubectl get secret | grep jwk
1jwk-secret nginx.org/jwk 1 40s
kubectl get policy
1NAME         STATE   AGE
2jwt-policy   Valid   38s
kubectl get vs
1NAME     STATE   HOST                 IP    PORTS   AGE
2webapp   Valid   webapp.example.com                 35s
動作確認
Policyが適用されたVirtualServerにJWTをHeaderに付与していないため、通信に対し 401 Authorization required が応答されていることを確認します
curl -H "Host:webapp.example.com" http://localhost/
1<html>
2<head><title>401 Authorization Required</title></head>
3<body>
4<center><h1>401 Authorization Required</h1></center>
5<hr><center>nginx/1.23.4</center>
6</body>
7</html>
curlコマンドで動作を確認します。以下のように通信が 許可 されていることが確認できます
curl -H "Host:webapp.example.com" http://localhost/ -H "Token: `cat token.jwt`"
1Server address: 192.168.127.57:8080
2Server name: webapp-64d444885-r5fnt
3Date: 18/Jan/2022:12:49:59 +0000
4URI: /
5Request ID: 86182122eec0392769b4d86d64653419
リソースの削除
## cd ~/kubernetes-ingress/examples/custom-resources/jwt/
kubectl delete -f virtual-server.yaml
kubectl delete -f jwt.yaml
kubectl delete -f jwk-secret.yaml
kubectl delete -f webapp.yaml
Ingress Controller で OIDC RPのデプロイ
https://github.com/nginx/kubernetes-ingress/tree/v3.1.1/examples/custom-resources/oidc
サンプルアプリケーションをデプロイ
リソースをデプロイします。ここでIDPとして動作させる KeyCloak をデプロイします
cd ~/kubernetes-ingress/examples/custom-resources/oidc
kubectl apply -f tls-secret.yaml
kubectl apply -f webapp.yaml
kubectl apply -f keycloak.yaml
kubectl apply -f virtual-server-idp.yaml
このサンプルで利用するFQDNを確認します。ラボ環境のJumpHostでは予め双方のFQDNを登録しています。
## cd ~/kubernetes-ingress/examples/custom-resources/oidc
grep host virtual-server*yaml
1virtual-server-idp.yaml:  host: keycloak.example.com
2virtual-server.yaml:  host: webapp.example.com
https://keycloak.example.com へアクセスしてください。Note
Keycloak はデプロイから起動まで数分(2~3分)かかります。正しく疎通ができない場合は一定時間おいて再度接続してください
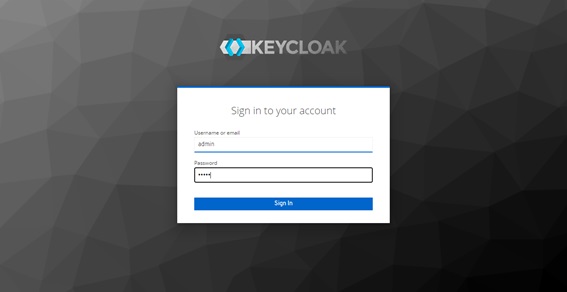
Administration Console を開きます。ログイン画面が表示されますので以下の情報でログインしてください。
ログイン情報
usename |
admin |
|---|---|
password |
admin |
左メニューより Clients を開き、 Create から新規作成を行います。
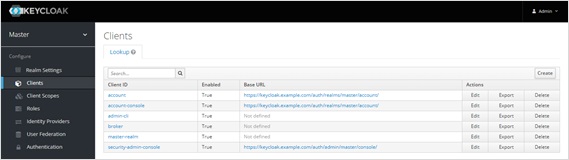
Client ID: nginx-plus を指定し、 Save します。
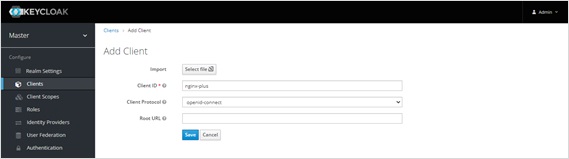
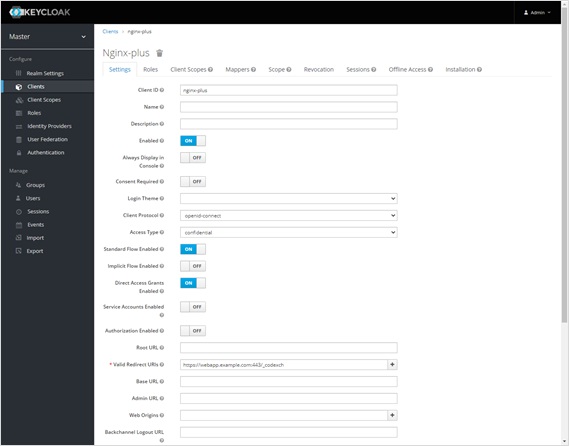
SettingsタブのAccess Type: confidential を選択し、Valid Redirect URIs: https://webapp.example.com:443/_codexch を入力し、 Save します。
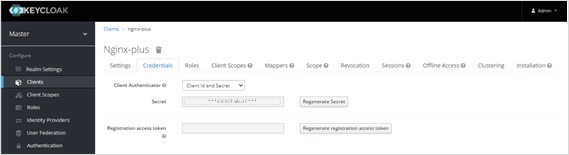
Credentialsタブを開きます。後ほどSecretの値を利用しますので表示されている文字列を記録しておきます。
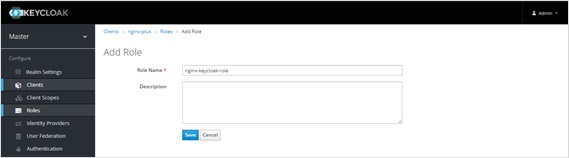
Rolesタブを開き、 Add Role から追加を行います。
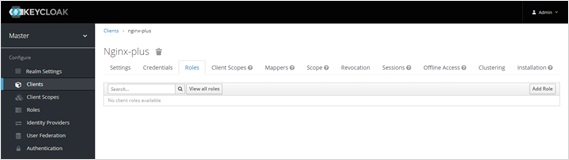
Role Name: nginx-keycloak-role を指定し、 Save します。
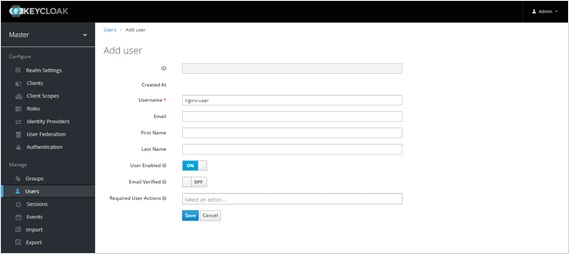
左メニュー Users を開き、 Add user からユーザの新規作成を行います。
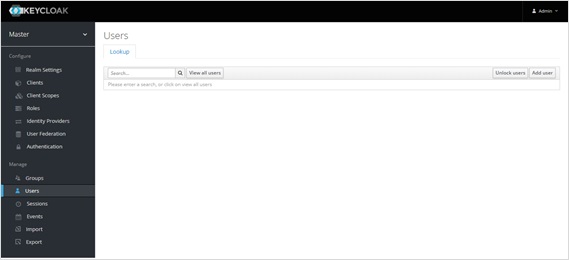
Username: nginx-user を指定し、 Save します。
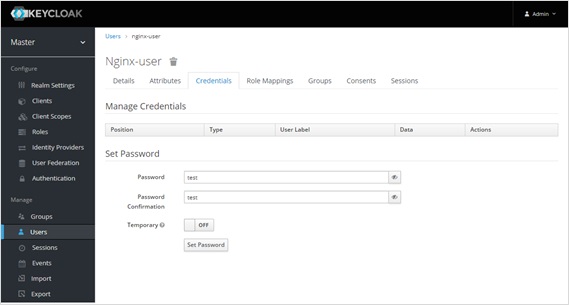
Credentialsタブを開き、Password: test を入力、Temporary: Off を選択し、nginx-userのパスワードを設定します。
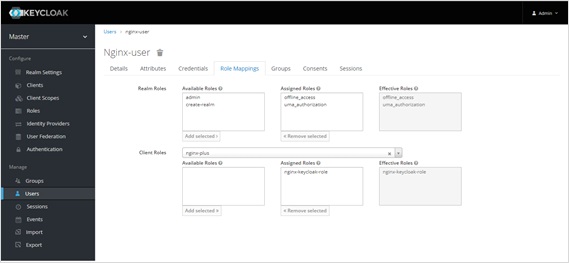
Role Mappingsタブを開き、Client Roles: nginx-plus を選択し、Available Rolesに表示される nginx-keycloak-role を選択し、 Add selected でRoleをAssignします。
これでKeycloakの準備は完了しました。
先程、Keycloakで確認したSecretの内容をbase64エンコードします
echo -n "f0558674-70a1-45a9-8c90-02245628b8f1" | base64
1ZjA1NTg2NzQtNzBhMS00NWE5LThjOTAtMDIyNDU2MjhiOGYx
client-secret.yaml に設定します
## cd ~/kubernetes-ingress/examples/custom-resources/oidc
vi client-secret.yaml
1apiVersion: v1
2kind: Secret
3metadata:
4  name: oidc-secret
5type: nginx.org/oidc
6data:
7  client-secret: ***BASE64 EncodeしたSECRET情報***
OIDC PolicyとClientSecretをデプロイします。
## cd ~/kubernetes-ingress/examples/custom-resources/oidc
kubectl apply -f client-secret.yaml
kubectl apply -f oidc.yaml
本書の環境では単一のPodでNGINX Ingress Controllerを動作させているためZone Synchronizationの設定はしません。必要となる方は手順を参考に実施してください。
最後にNGINX Ingress ControllerをWebアプリケーション用のOIDC RP として動作させるため、VirtualServerを作成します。kbue-dnsのIPアドレスを確認し、virtual-server.yamlに設定を追加します。
kubectl get svc -n kube-system | grep kube-dns
1kube-dns ClusterIP 10.96.0.10 <none> 53/UDP,53/TCP,9153/TCP 12d
## cd ~/kubernetes-ingress/examples/custom-resources/oidc
vi virtual-server.yaml
 1apiVersion: k8s.nginx.org/v1
 2kind: VirtualServer
 3metadata:
 4  name: webapp
 5spec:
 6  host: webapp.example.com
 7  tls:
 8    secret: tls-secret
 9    redirect:
10      enable: true
11  server-snippets: |
12    resolver 10.96.0.10;                     # kube-dnsのIPアドレスを指定します
13  upstreams:
14    - name: webapp
15      service: webapp-svc
16      port: 80
17  routes:
18    - path: /
19      policies:
20      - name: oidc-policy
21      action:
22        pass: webapp
## cd ~/kubernetes-ingress/examples/custom-resources/oidc
kubectl apply -f virtual-server.yaml
リソースを確認
以下の通り、各リソースを適切に作成されていることを確認します。
kubectl get secret | grep -e oidc -e tls-secret
1oidc-secret           nginx.org/oidc                        1      4m29s
2tls-secret            kubernetes.io/tls                     2      21m
kubectl get deployment
1NAME       READY   UP-TO-DATE   AVAILABLE   AGE
2keycloak   1/1     1            1           22m
3webapp     1/1     1            1           22m
kubectl get svc
1NAME         TYPE        CLUSTER-IP      EXTERNAL-IP   PORT(S)    AGE
2keycloak     ClusterIP   10.97.4.138     <none>        8080/TCP   22m
3kubernetes   ClusterIP   10.96.0.1       <none>        443/TCP    12d
4webapp-svc   ClusterIP   10.104.69.230   <none>        80/TCP     22m
kubectl get policy
1NAME          STATE   AGE
2oidc-policy   Valid   9m28s
kubectl get vs
1NAME       STATE   HOST                   IP    PORTS   AGE
2keycloak   Valid   keycloak.example.com                 23m
3webapp     Valid   webapp.example.com                   7m40s
動作確認
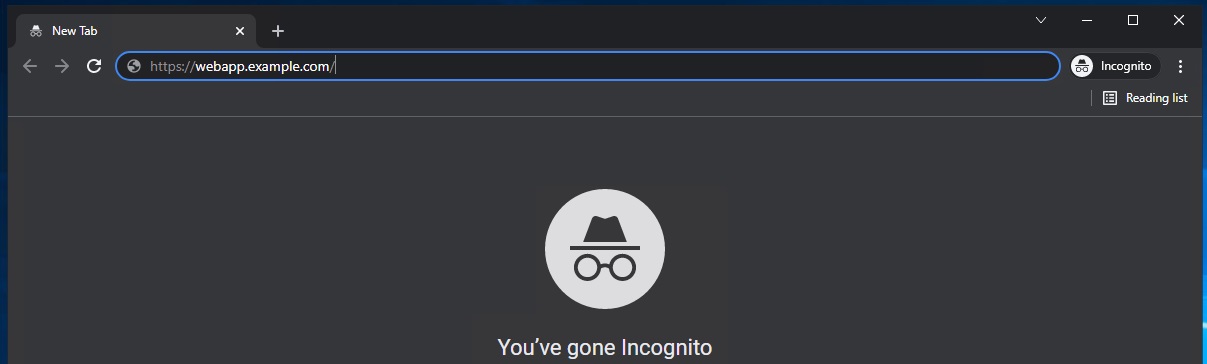
Chromeブラウザを開き、 Secret Tab (New Incognito Window) を開いてください。

https://webapp.example.com へアクセスしてください。
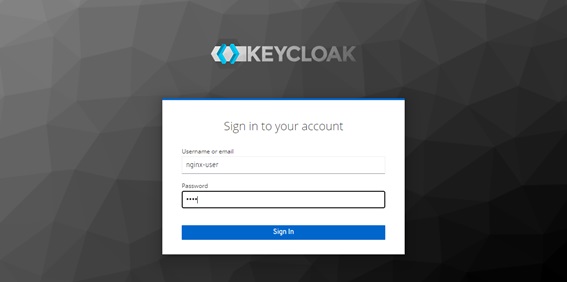
Keycloakのログイン画面が表示されます。先程設定を行った nginx-user でログインしてください。
ログイン情報
usename |
password |
|---|---|
nginx-user |
test |
ログインが正常に行われた場合、Webアプリケーションの結果をブラウザで確認いただけます。

リソースの削除
## cd ~/kubernetes-ingress/examples/custom-resources/oidc
kubectl delete -f webapp.yaml
kubectl delete -f keycloak.yaml
kubectl delete -f virtual-server-idp.yaml
kubectl delete -f client-secret.yaml
kubectl delete -f oidc.yaml
kubectl delete -f virtual-server.yaml
Ingress MTLS
https://github.com/nginx/kubernetes-ingress/tree/v3.1.1/examples/custom-resources/ingress-mtls
サンプルアプリケーションをデプロイ
cd ~/kubernetes-ingress/examples/custom-resources/ingress-mtls
kubectl apply -f webapp.yaml
kubectl apply -f ingress-mtls-secret.yaml
kubectl apply -f ingress-mtls.yaml
kubectl replace --force -f tls-secret.yaml
kubectl apply -f virtual-server.yaml
リソースを確認
ポイントとなるファイルの内容を確認します。
ingress-mtls-secret.yaml でクライアント証明書の評価に用いる証明書を作成します。
1kind: Secret
2metadata:
3  name: ingress-mtls-secret
4apiVersion: v1
5type: nginx.org/ca
6data:
7  ca.crt: **省略**
ingress-mtls.yaml は別途作成した ingress-mtls-secret をclientCertSecretに指定し(7)、Virtual Serverで利用するPolicyを作成します。
1apiVersion: k8s.nginx.org/v1
2kind: Policy
3metadata:
4  name: ingress-mtls-policy
5spec:
6  ingressMTLS:
7    clientCertSecret: ingress-mtls-secret
8    verifyClient: "on"
9    verifyDepth: 1
作成した ingress-mtls-policy というPolicyをリクエストに対し適用するため、TLSの指定(7,8)と、Policyの指定(9,10)を行っています
 1apiVersion: k8s.nginx.org/v1
 2kind: VirtualServer
 3metadata:
 4  name: webapp
 5spec:
 6  host: webapp.example.com
 7  tls:
 8    secret: tls-secret
 9  policies:
10  - name: ingress-mtls-policy
11  upstreams:
12  - name: webapp
13    service: webapp-svc
14    port: 80
15  routes:
16  - path: /
17    action:
18      pass: webapp
通信に利用される証明書の内容は、以下コマンドを参考に確認してください
# echo -n <ca.crt に指定された文字列> | base64 -d > ca-crt.txt
echo -n "LS0tLS1CRUdJTiBDRVJUSUZJQ0FURS0tLS0tCk1JSUQvVENDQXVXZ0F3SUJBZ0lVSzdhbU14OFlLWG1BVG51SkZETDlWS2ZUR2ZNd0RRWUpLb1pJaHZjTkFRRUwKQlFBd2dZMHhDekFKQmdOVkJBWVRBbFZUTVFzd0NRWURWUVFJREFKRFFURVdNQlFHQTFVRUJ3d05VMkZ1SUVaeQpZVzVqYVhOamJ6RU9NQXdHQTFVRUNnd0ZUa2RKVGxneEREQUtCZ05WQkFzTUEwdEpRekVXTUJRR0ExVUVBd3dOCmEybGpMbTVuYVc1NExtTnZiVEVqTUNFR0NTcUdTSWIzRFFFSkFSWVVhM1ZpWlhKdVpYUmxjMEJ1WjJsdWVDNWoKYjIwd0hoY05NakF3T1RFNE1qQXlOVEkyV2hjTk16QXdPVEUyTWpBeU5USTJXakNCalRFTE1Ba0dBMVVFQmhNQwpWVk14Q3pBSkJnTlZCQWdNQWtOQk1SWXdGQVlEVlFRSERBMVRZVzRnUm5KaGJtTnBjMk52TVE0d0RBWURWUVFLCkRBVk9SMGxPV0RFTU1Bb0dBMVVFQ3d3RFMwbERNUll3RkFZRFZRUUREQTFyYVdNdWJtZHBibmd1WTI5dE1TTXcKSVFZSktvWklodmNOQVFrQkZoUnJkV0psY201bGRHVnpRRzVuYVc1NExtTnZiVENDQVNJd0RRWUpLb1pJaHZjTgpBUUVCQlFBRGdnRVBBRENDQVFvQ2dnRUJBTmFINVRzaTZzaUFsU085dEJnYmY3VVRwcWowMUhRTlQ2UjhtQy9pCjhLYXFaSW9XSUdvN2xhTW9xTDYydTc4ay9WOHM2Z0FJaU1DSzBjekFvTFhNSnlJQkxQeTg4Yzdtc2xwZXgxTkEKVmRtMkVTVkN6bVlERE1TT3FpVmszWmpYeC9URmo2QzhNRFhhRkZUWFg1dWdtbWdscnFCWlh0OVI5VVBwVTJMNwo1bEZ0NlJ2R3VGczgvbVZORVR5c1A0SFhCWlh2ZE9mdG1YWUkvK01hOW5CMzIzNjdmcTI0L0RKZ2YvK2xRbUsxCkJLR3poSTZSc1pSSmdWOXdpK1VuZTBYNjlaS2lLOFdXU3lZS252YnRrcHZuTDA2dGNJaXJZNi80UzZ4Sm1HRVQKZEJUNmVxc0NoSUpQUStWSEp5dTROdnV6WmVCUXpGdmMwNytnUGZkVWZra1FXODhDQXdFQUFhTlRNRkV3SFFZRApWUjBPQkJZRUZKUGdhcnFYa00rdEJ0djVhdndTUWhUQmpTU2VNQjhHQTFVZEl3UVlNQmFBRkpQZ2FycVhrTSt0CkJ0djVhdndTUWhUQmpTU2VNQThHQTFVZEV3RUIvd1FGTUFNQkFmOHdEUVlKS29aSWh2Y05BUUVMQlFBRGdnRUIKQUl3WXpoY0s4OWtRL0xGWjZFRHgrQWp2bnJTVSs1cmdwQkgrRjVTNUUyY3pXOE5rNXhySnl0Y0ZUbUtlKzZScwpENHlxeTZSVVFEeWNYaDlPelBjbzgzYTBoeFlCZ1M5MWtJa25wYWF4dndLRDJleWc3UGNnK1lkS1FhZFlMcUY0CmI3cWVtc1FVVkpOWHdkZS9VanRBejlEOTh4dngwM2hQY2Qwb2dzUUhWZ21BZVpFd2l3UzFmTy9WNUE4dTl3MEkKcHlJRTVReXlHcHNpS2dpalpiMmhrS05RVHVJcEhiVnFydVA4eEV6TlFnamhkdS9uUW5OYy9lRUltVUlrQkFUVQpiSHdQc2xwYzVhdVV1TXJxR3lEQ0p2QUJpV3J2SmE3Yi9XcmtDT3FUWVhtR2NGM0w1ZU9FeTBhYkp0M2NNcSs5CnJLTUNVQWlkNG0yNEthWnc3OUk2anNBPQotLS0tLUVORCBDRVJUSUZJQ0FURS0tLS0tCg==" | base64 -d > ca-crt.txt
openssl x509 -text -noout -in ca-crt.txt
 1Certificate:
 2  Data:
 3      Version: 3 (0x2)
 4      Serial Number:
 5          2b:b6:a6:33:1f:18:29:79:80:4e:7b:89:14:32:fd:54:a7:d3:19:f3
 6      Signature Algorithm: sha256WithRSAEncryption
 7      Issuer: C = US, ST = CA, L = San Francisco, O = NGINX, OU = KIC, CN = kic.nginx.com, emailAddress = kubernetes@nginx.com
 8      Validity
 9          Not Before: Sep 18 20:25:26 2020 GMT
10          Not After : Sep 16 20:25:26 2030 GMT
11      Subject: C = US, ST = CA, L = San Francisco, O = NGINX, OU = KIC, CN = kic.nginx.com, emailAddress = kubernetes@nginx.com
12      **省略**
openssl x509 -text -noout -in client-cert.pem
 1Certificate:
 2    Data:
 3        Version: 1 (0x0)
 4        Serial Number: 1 (0x1)
 5        Signature Algorithm: sha256WithRSAEncryption
 6        Issuer: C = US, ST = CA, L = San Francisco, O = NGINX, OU = KIC, CN = kic.nginx.com, emailAddress = kubernetes@nginx.com
 7        Validity
 8            Not Before: Sep 18 20:27:15 2020 GMT
 9            Not After : Sep 16 20:27:15 2030 GMT
10        Subject: C = US, ST = CA, L = San Francisco, O = NGINX
11        **省略**
以下の通り、各リソースを適切に作成されていることを確認します。
kubectl get deployment
1NAME     READY   UP-TO-DATE   AVAILABLE   AGE
2webapp   1/1     1            1           8s
kubectl get secret | grep -e tls-secret
1ingress-mtls-secret   nginx.org/ca                          1      32s
2tls-secret            kubernetes.io/tls                     2      31s
kubectl get policy
1NAME                  STATE   AGE
2ingress-mtls-policy   Valid   44s
kubectl get vs
1NAME     STATE   HOST                 IP    PORTS   AGE
2webapp   Valid   webapp.example.com                 48s
動作確認
curl -v -k --resolve webapp.example.com:443:127.0.0.1 https://webapp.example.com:443/
 1* Added webapp.example.com:443:127.0.0.1 to DNS cache
 2* Hostname webapp.example.com was found in DNS cache
 3*   Trying 127.0.0.1:443...
 4* TCP_NODELAY set
 5* Connected to webapp.example.com (127.0.0.1) port 443 (#0)
 6* ALPN, offering h2
 7* ALPN, offering http/1.1
 8* successfully set certificate verify locations:
 9*   CAfile: /etc/ssl/certs/ca-certificates.crt
10  CApath: /etc/ssl/certs
11* TLSv1.3 (OUT), TLS handshake, Client hello (1):
12* TLSv1.3 (IN), TLS handshake, Server hello (2):
13* TLSv1.2 (IN), TLS handshake, Certificate (11):
14* TLSv1.2 (IN), TLS handshake, Server key exchange (12):
15* TLSv1.2 (IN), TLS handshake, Request CERT (13):
16* TLSv1.2 (IN), TLS handshake, Server finished (14):
17* TLSv1.2 (OUT), TLS handshake, Certificate (11):
18* TLSv1.2 (OUT), TLS handshake, Client key exchange (16):
19* TLSv1.2 (OUT), TLS change cipher, Change cipher spec (1):
20* TLSv1.2 (OUT), TLS handshake, Finished (20):
21* TLSv1.2 (IN), TLS handshake, Finished (20):
22* SSL connection using TLSv1.2 / ECDHE-RSA-AES256-GCM-SHA384
23* ALPN, server accepted to use http/1.1
24* Server certificate:
25*  subject: CN=webapp.example.com
26*  start date: Sep 29 22:19:59 2020 GMT
27*  expire date: Sep 27 22:19:59 2030 GMT
28*  issuer: CN=webapp.example.com
29*  SSL certificate verify result: self signed certificate (18), continuing anyway.
30> GET / HTTP/1.1
31> Host: webapp.example.com
32> User-Agent: curl/7.68.0
33> Accept: */*
34>
35* Mark bundle as not supporting multiuse
36< HTTP/1.1 400 Bad Request
37< Server: nginx/1.21.3
38< Date: Wed, 19 Jan 2022 12:16:54 GMT
39< Content-Type: text/html
40< Content-Length: 237
41< Connection: close
42<
43<html>
44<head><title>400 No required SSL certificate was sent</title></head>
45<body>
46<center><h1>400 Bad Request</h1></center>
47<center>No required SSL certificate was sent</center>
48<hr><center>nginx/1.21.3</center>
49</body>
50</html>
51* Closing connection 0
52* TLSv1.2 (OUT), TLS alert, close notify (256):
curl -v -k --resolve webapp.example.com:443:127.0.0.1 https://webapp.example.com:443/ --cert ./client-cert.pem --key ./client-key.pem
 1* Added webapp.example.com:443:127.0.0.1 to DNS cache
 2* Hostname webapp.example.com was found in DNS cache
 3*   Trying 127.0.0.1:443...
 4* TCP_NODELAY set
 5* Connected to webapp.example.com (127.0.0.1) port 443 (#0)
 6* ALPN, offering h2
 7* ALPN, offering http/1.1
 8* successfully set certificate verify locations:
 9*   CAfile: /etc/ssl/certs/ca-certificates.crt
10  CApath: /etc/ssl/certs
11* TLSv1.3 (OUT), TLS handshake, Client hello (1):
12* TLSv1.3 (IN), TLS handshake, Server hello (2):
13* TLSv1.2 (IN), TLS handshake, Certificate (11):
14* TLSv1.2 (IN), TLS handshake, Server key exchange (12):
15* TLSv1.2 (IN), TLS handshake, Request CERT (13):
16* TLSv1.2 (IN), TLS handshake, Server finished (14):
17* TLSv1.2 (OUT), TLS handshake, Certificate (11):
18* TLSv1.2 (OUT), TLS handshake, Client key exchange (16):
19* TLSv1.2 (OUT), TLS handshake, CERT verify (15):
20* TLSv1.2 (OUT), TLS change cipher, Change cipher spec (1):
21* TLSv1.2 (OUT), TLS handshake, Finished (20):
22* TLSv1.2 (IN), TLS handshake, Finished (20):
23* SSL connection using TLSv1.2 / ECDHE-RSA-AES256-GCM-SHA384
24* ALPN, server accepted to use http/1.1
25* Server certificate:
26*  subject: CN=webapp.example.com
27*  start date: Sep 29 22:19:59 2020 GMT
28*  expire date: Sep 27 22:19:59 2030 GMT
29*  issuer: CN=webapp.example.com
30*  SSL certificate verify result: self signed certificate (18), continuing anyway.
31> GET / HTTP/1.1
32> Host: webapp.example.com
33> User-Agent: curl/7.68.0
34> Accept: */*
35>
36* Mark bundle as not supporting multiuse
37< HTTP/1.1 200 OK
38< Server: nginx/1.21.3
39< Date: Wed, 19 Jan 2022 12:16:56 GMT
40< Content-Type: text/plain
41< Content-Length: 157
42< Connection: keep-alive
43< Expires: Wed, 19 Jan 2022 12:16:55 GMT
44< Cache-Control: no-cache
45<
46Server address: 192.168.127.22:8080
47Server name: webapp-64d444885-x5d4p
48Date: 19/Jan/2022:12:16:56 +0000
49URI: /
50Request ID: c1b1c9c9b30331cbc7f034e026b939fc
51* Connection #0 to host webapp.example.com left intact
リソースの削除
## cd ~/kubernetes-ingress/examples/custom-resources/ingress-mtls
kubectl delete -f webapp.yaml
kubectl delete -f ingress-mtls-secret.yaml
kubectl delete -f ingress-mtls.yaml
kubectl delete -f tls-secret.yaml
kubectl delete -f virtual-server.yaml
rm ca-crt.txt
Egress MTLS
https://github.com/nginx/kubernetes-ingress/tree/v3.1.1/examples/custom-resources/egress-mtls
サンプルアプリケーションをデプロイ
cd ~/kubernetes-ingress/examples/custom-resources/egress-mtls
kubectl apply -f secure-app.yaml
kubectl apply -f egress-mtls-secret.yaml
kubectl apply -f egress-trusted-ca-secret.yaml
kubectl apply -f egress-mtls.yaml
kubectl apply -f virtual-server.yaml
リソースを確認
secure-app.yaml は、Kubernetes環境内で動作するアプリケーションで、クライアント証明書の評価を行います。ポイントとなる箇所を以下に示します。volumeMountsでそれぞれのPathにVolumeをマウントしています。/etc/nginx/sslに
app-tls-secretというSecret(22,29)、/etc/nginx/conf.d/にsecure-configというConfigMap(24,32)の内容がそれぞれマウントされますsecure-configというConfigMapではNGINXの設定を指定します。SSLの終端(58,59)及び、クライアント証明書(61,62)の評価を行うよう設定を記述しています
 1apiVersion: apps/v1
 2kind: Deployment
 3metadata:
 4  name: secure-app
 5spec:
 6  replicas: 1
 7  selector:
 8    matchLabels:
 9      app: secure-app
10  template:
11    metadata:
12      labels:
13        app: secure-app
14    spec:
15      containers:
16        - name: secure-app
17          image: nginxdemos/nginx-hello:plain-text
18          ports:
19            - containerPort: 8443
20          volumeMounts:
21            - name: secret
22              mountPath: /etc/nginx/ssl
23              readOnly: true
24            - name: config-volume
25              mountPath: /etc/nginx/conf.d
26      volumes:
27        - name: secret
28          secret:
29            secretName: app-tls-secret
30        - name: config-volume
31          configMap:
32            name: secure-config
33---
34apiVersion: v1
35kind: Service
36metadata:
37  name: secure-app
38spec:
39  ports:
40    - port: 8443
41      targetPort: 8443
42      protocol: TCP
43      name: https
44  selector:
45    app: secure-app
46---
47apiVersion: v1
48kind: ConfigMap
49metadata:
50  name: secure-config
51data:
52  app.conf: |-
53    server {
54      listen 8443 ssl;
55
56      server_name secure-app.example.com;
57
58      ssl_certificate /etc/nginx/ssl/tls.crt;
59      ssl_certificate_key /etc/nginx/ssl/tls.key;
60
61      ssl_verify_client on;
62      ssl_client_certificate /etc/nginx/ssl/ca.crt;
63
64      default_type text/plain;
65
66      location / {
67        return 200 "hello from pod $hostname\n";
68      }
69    }
70---
71apiVersion: v1
72kind: Secret
73metadata:
74  name: app-tls-secret
75type: Opaque
76data:
77  tls.crt: **省略**
78  tls.key: **省略**
79  ca.crt: **省略**
egress-mtls.yaml は、VirtualServerに適用する EgressTlsのPolicyとなります。アプリケーションへ転送する際にの証明書として egress-mtls-secret 、 egress-trusted-ca-secret として作成したSecretを参照します(7,8)。
 1apiVersion: k8s.nginx.org/v1
 2kind: Policy
 3metadata:
 4  name: egress-mtls-policy
 5spec:
 6  egressMTLS:
 7    tlsSecret: egress-mtls-secret
 8    trustedCertSecret: egress-trusted-ca-secret
 9    verifyServer: on
10    verifyDepth: 2
11    serverName: on
12    sslName: secure-app.example.com
virtual-server.yaml は、upstreamへtlsを有効にし(11,12)、routesで、 egress-mtls-policy を指定しています(14,15)。
 1apiVersion: k8s.nginx.org/v1
 2kind: VirtualServer
 3metadata:
 4  name: webapp
 5spec:
 6  host: webapp.example.com
 7  upstreams:
 8  - name: secure-app
 9    service: secure-app
10    port: 8443
11    tls:
12      enable: true
13  routes:
14  - path: /
15    policies:
16    - name: egress-mtls-policy
17    action:
18      pass: secure-app
以下の通り、各リソースを適切に作成されていることを確認します。
kubectl get deployment
1NAME         READY   UP-TO-DATE   AVAILABLE   AGE
2secure-app   1/1     1            1           73s
kubectl get pod
1NAME                          READY   STATUS    RESTARTS   AGE
2secure-app-6dc947cc5f-8855b   1/1     Running   0          75s
kubectl get svc | grep secure-app
1secure-app ClusterIP 10.101.84.115 <none> 8443/TCP 5m17s
kubectl get secret | grep -e app-tls -e egress
1app-tls-secret             Opaque                                3      6m53s
2egress-mtls-secret         kubernetes.io/tls                     2      6m48s
3egress-trusted-ca-secret   nginx.org/ca                          1      6m42s
動作確認
curl -v -H "Host:webapp.example.com" http://localhost/
 1*   Trying 127.0.0.1:80...
 2* TCP_NODELAY set
 3* Connected to localhost (127.0.0.1) port 80 (#0)
 4> GET / HTTP/1.1
 5> Host:webapp.example.com
 6> User-Agent: curl/7.68.0
 7> Accept: */*
 8>
 9* Mark bundle as not supporting multiuse
10< HTTP/1.1 200 OK
11< Server: nginx/1.21.3
12< Date: Wed, 19 Jan 2022 15:14:03 GMT
13< Content-Type: text/plain
14< Content-Length: 43
15< Connection: keep-alive
16<
17hello from pod secure-app-6dc947cc5f-8855b
18* Connection #0 to host localhost left intact
リソースの削除
## cd ~/kubernetes-ingress/examples/custom-resources/egress-mtls
kubectl delete -f secure-app.yaml
kubectl delete -f egress-mtls-secret.yaml
kubectl delete -f egress-trusted-ca-secret.yaml
kubectl delete -f egress-mtls.yaml
kubectl delete -f virtual-server.yaml